How to Design a Landscape Lighting Plan: Illuminate Your Outdoor Spaces

A dramatic nighttime shot of a beautifully lit residential property, showcasing various landscape lighting techniques.

Are you looking to enhance the beauty, safety, and functionality of your outdoor spaces after dark? Landscape lighting is the key to unlocking your yard’s full potential, creating a magical ambiance that extends your living area well into the evening hours. 

As experienced landscaping professionals, McTighe Landscaping has compiled this detailed guide to help you navigate the intricacies of landscape lighting design. Whether you’re a DIY enthusiast or considering professional installation, this comprehensive resource will illuminate the path to your perfect outdoor lighting plan.

Why Landscape Lighting Matters

Before diving into the specifics of design, let’s shed some light on why landscape lighting is a game-changer for your property:

  1. Enhanced Curb Appeal: Well-placed lighting accentuates your home’s architectural features and landscaping, boosting its overall aesthetic appeal. A thoughtfully illuminated exterior creates a welcoming atmosphere and makes your property stand out in the neighborhood.
  1. Improved Safety: Illuminated pathways, steps, and entryways significantly reduce the risk of accidents and trips after dark. Proper lighting ensures that family members and guests can navigate your outdoor spaces with confidence, even in low-light conditions.
  1. Increased Security: A well-lit property acts as a powerful deterrent to potential intruders. Strategic lighting eliminates dark corners and shadows where trespassers might hide, creating a sense of security for your home and family.
  1. Extended Outdoor Living: Proper lighting allows you to enjoy your outdoor spaces long after sunset. Whether you’re hosting a late-night barbecue, enjoying a quiet evening on the patio, or taking a moonlit stroll through your garden, landscape lighting extends the usability of your outdoor areas.
  1. Increased Property Value: A thoughtfully designed landscape lighting system can significantly enhance your property’s value and marketability. Potential buyers are often impressed by the added functionality and aesthetic appeal that professional lighting brings to a home’s exterior.


Now that we’ve highlighted the importance of landscape lighting, let’s explore how to create a stunning lighting design for your outdoor spaces.

The Step-by-Step Guide to Designing Your Landscape Lighting Plan

1. Evaluate Your Outdoor Space

The first step in creating an effective landscape lighting plan is to thoroughly assess your property after dark. This evaluation will help you identify areas that require lighting and features you want to highlight. Consider the following:

  • Walkways and Paths: Note areas where additional lighting could improve safety and navigation. Pay special attention to uneven surfaces, steps, or changes in elevation.
  • Focal Points: Identify trees, sculptures, water features, or architectural elements you’d like to showcase. These elements can become stunning visual anchors in your nighttime landscape.
  • Outdoor Living Areas: Determine which spaces, such as patios or decks, need functional lighting for evening use. Consider how you use these areas and what types of activities you’ll be doing after dark.
  • Entry Points: Assess your home’s entrance and other access points that could benefit from improved illumination. A well-lit entryway not only enhances security but also creates a warm welcome for guests.


Pro Tip:
Create a rough sketch of your property, marking potential lighting locations. This visual aid will be invaluable as you progress through the design process. Take photos of your property at night to identify dark areas and potential hazards that may not be apparent during the day.

2. Define Your Lighting Objectives

With your property assessment complete, it’s time to set clear goals for your landscape lighting design. Common objectives include:

  • Safety: Ensuring all paths, steps, and potential hazards are well-lit to prevent accidents. This should be a top priority in any lighting plan.
  • Security: Illuminating dark areas and potential entry points to deter unwanted visitors. Consider motion-activated lights for added security.
  • Aesthetics: Highlighting specific landscape features or architectural elements to create visual interest. This can dramatically enhance the overall appearance of your property at night.
  • Functionality: Providing adequate light for outdoor activities and entertaining. Think about how you want to use your outdoor spaces in the evening and ensure those areas are properly illuminated.


Prioritize these objectives based on your specific needs and preferences. This prioritization will guide your decisions throughout the design process and help you allocate your budget effectively.
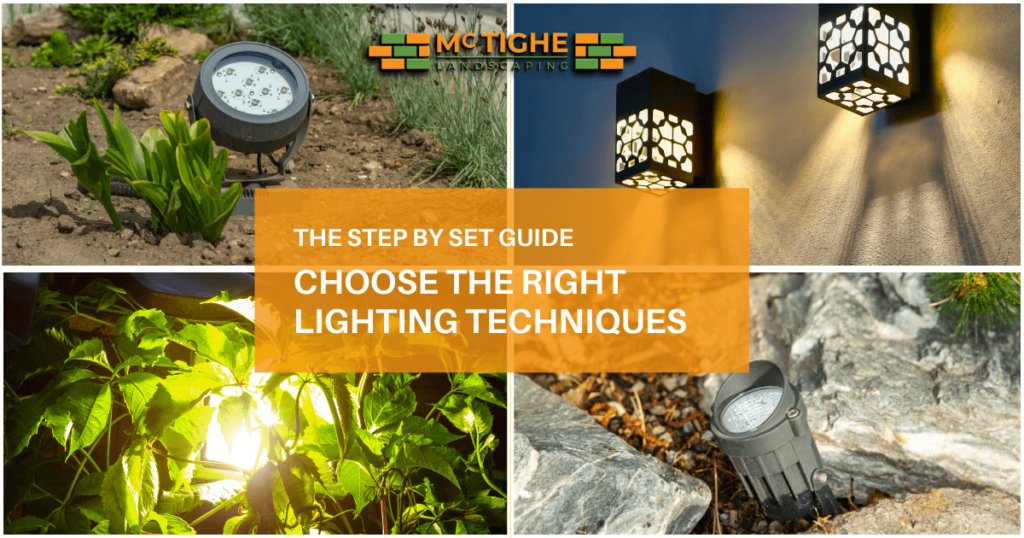
Lighting techniques, a split-screen image showing four common lighting techniques side by side: Uplighting, Downlighting, Path Lighting, and Accent Lighting.

3. Choose the Right Lighting Techniques

To achieve your lighting objectives, you’ll need to employ various lighting techniques. Here are some popular methods used in landscape lighting design

Uplighting

This technique involves placing lights at ground level and directing them upward. It’s excellent for:

  • Highlighting trees, tall plants, or architectural features
  • Creating dramatic shadows and depth
  • Adding vertical interest to your nighttime landscape


Uplighting can make trees appear taller and more majestic, draw attention to interesting bark textures, or accentuate the unique architecture of your home.

Downlighting

Also known as moonlighting, this technique mimics natural light by placing fixtures high in trees or on structures, pointing downward. Use it for:

  • Illuminating large areas with a soft, natural glow
  • Creating interesting shadow patterns on the ground
  • Providing gentle, ambient lighting for outdoor living spaces


Downlighting can create a romantic, moonlit effect in your garden or provide practical illumination for outdoor dining areas.

Path Lighting

As the name suggests, this technique focuses on lighting walkways and paths. It’s crucial for:

  • Ensuring safe navigation through your landscape
  • Guiding visitors to specific areas of your property
  • Adding a decorative element to garden paths and driveways


Path lights should be spaced evenly to provide consistent illumination without creating a “runway” effect.

Accent Lighting

This technique uses focused beams to draw attention to specific features. It’s perfect for:

  • Highlighting sculptures, water features, or unique plants
  • Creating focal points in your landscape design
  • Emphasizing the texture of walls or other architectural elements


Accent lighting can be used to create drama and interest in your nighttime landscape, drawing the eye to key features.

Silhouette Lighting

By placing lights behind an object and directing them towards a wall or fence, you can create striking silhouettes. Use this technique to:

  • Add drama and visual interest to your landscape
  • Highlight interesting shapes or forms in your garden
  • Create a sense of depth and mystery in your outdoor spaces


Silhouette lighting works particularly well with plants or sculptures that have distinctive shapes or outlines.

4. Select Appropriate Lighting Fixtures

With your techniques mapped out, it’s time to choose the right fixtures for the job. Here are some common types of landscape lighting fixtures:

  • Path Lights: Low-profile fixtures that provide soft, even lighting along walkways. Choose fixtures with glare shields to prevent light pollution and improve visibility.
  • Spotlights: Adjustable fixtures that produce a focused beam of light, ideal for highlighting specific features. Look for models with adjustable heads for maximum flexibility.
  • Well Lights: In-ground fixtures that provide uplighting for trees, walls, or other vertical elements. These are great for creating a seamless, unobtrusive lighting design.
  • Floodlights: Broad-beam lights that illuminate large areas, often used for security purposes. Consider using motion sensors with floodlights to conserve energy and increase security.
  • Step Lights: Fixtures designed to be installed on stairs or deck risers for improved safety. These come in various styles to match your outdoor decor.
  • Hardscape Lights: Linear fixtures that can be integrated into retaining walls, steps, or under-cap applications. These provide subtle, architectural lighting that enhances the structure of your outdoor spaces.


When selecting fixtures, consider both functionality and aesthetics. Choose styles that complement your home’s architecture and landscape design. Opt for high-quality, durable materials that can withstand outdoor conditions, such as brass, copper, or powder-coated aluminum.

5. Opt for Energy-Efficient Solutions

In today’s environmentally conscious world, energy efficiency is a crucial factor in landscape lighting design. Here are some eco-friendly options to consider:

  • LED Bulbs: These energy-efficient bulbs use up to 75% less energy than traditional incandescent bulbs and last much longer. LEDs also come in a variety of color temperatures, allowing you to create the perfect ambiance for your outdoor spaces.
  • Solar-Powered Lights: Ideal for areas without easy access to electrical outlets, solar lights harness the sun’s energy to illuminate your landscape. While they may not be as bright as wired options, they’re perfect for accent lighting and path markers.
  • Low-Voltage Systems: Operating at 12 volts instead of 120 volts, these systems are safer, more energy-efficient, and easier to install than line-voltage alternatives. They’re also more flexible, allowing for easier adjustments and additions to your lighting design.


Consider implementing a combination of these energy-efficient solutions to create a sustainable and cost-effective lighting system for your landscape.
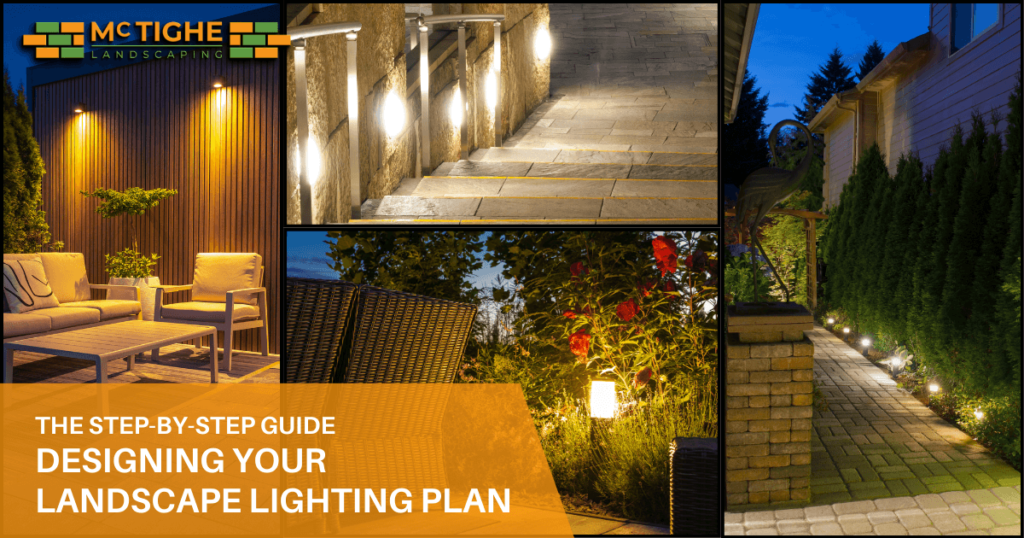
The step by step guide for Designing Your Landscape Lighting Plan

6. Create a Lighting Layout

With your objectives set and fixtures selected, it’s time to create a detailed lighting layout. Consider the following principles:

  • Balance: Distribute light evenly throughout your landscape to avoid harsh contrasts between light and dark areas. This creates a more harmonious and inviting outdoor environment.
  • Layering: Combine different lighting techniques and fixtures to add depth and dimension to your outdoor spaces. Use a mix of ambient, task, and accent lighting to create a well-rounded design.
  • Focal Points: Use lighting to guide the eye to key features or areas of your landscape. Create a hierarchy of lighting that draws attention to your property’s most impressive elements.
  • Subtlety: Remember, less is often more when it comes to landscape lighting. Aim for a soft, inviting glow rather than harsh, overpowering illumination. Avoid light pollution by directing fixtures downward and using shields where necessary.


When creating your layout, start with the essential lighting for safety and security, then add layers of aesthetic and functional lighting. Use your property sketch as a guide, marking the location and type of each fixture.

7. Consider Control Options

To maximize the efficiency and effectiveness of your landscape lighting system, consider incorporating smart control options:

  • Timers: Automatically turn lights on and off at preset times. This ensures your landscape is illuminated when needed without wasting energy during daylight hours.
  • Photocells: Activate lights when natural light levels drop below a certain point. These are great for ensuring your lights come on at dusk, regardless of the season.
  • Motion Sensors: Trigger lights when movement is detected, enhancing security and conserving energy. These are particularly useful for areas that don’t need constant illumination.
  • Smart Home Integration: Control your landscape lighting through your smartphone or home automation system. This allows for easy adjustments and the ability to create custom lighting scenes for different occasions.


Implementing a combination of these control options can significantly improve the functionality and energy efficiency of your landscape lighting system.
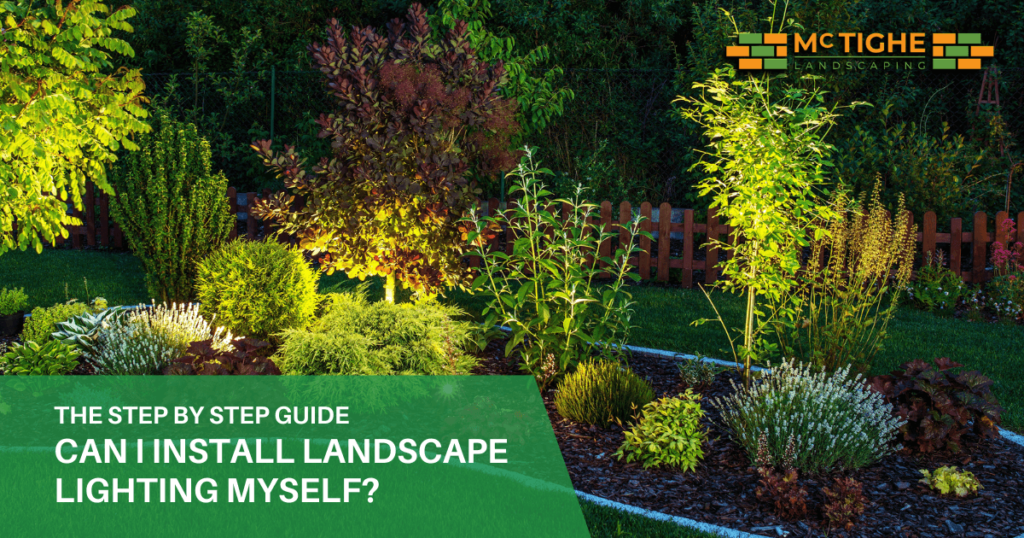
The step by step guide for can I install landscape lighting myself?

8. Professional Installation vs. DIY

While some homeowners may opt for a DIY approach to landscape lighting, professional installation offers several advantages:

  • Expertise: Professionals have the knowledge and experience to create optimal lighting designs. They understand the intricacies of different techniques and can recommend the best solutions for your specific property.
  • Safety: Proper installation ensures your system meets all safety standards and local codes. This is particularly important when dealing with electrical systems in outdoor environments.
  • Time-Saving: A professional team can complete the installation quickly and efficiently, saving you time and potential frustration.
  • Long-Term Value: Professional-grade fixtures and expert installation can lead to a longer-lasting, more reliable lighting system. This can save you money on repairs and replacements in the long run.


If you choose to go the DIY route, be sure to thoroughly research proper installation techniques and safety precautions before beginning your project. Always consult with a licensed electrician for any work involving electrical systems.
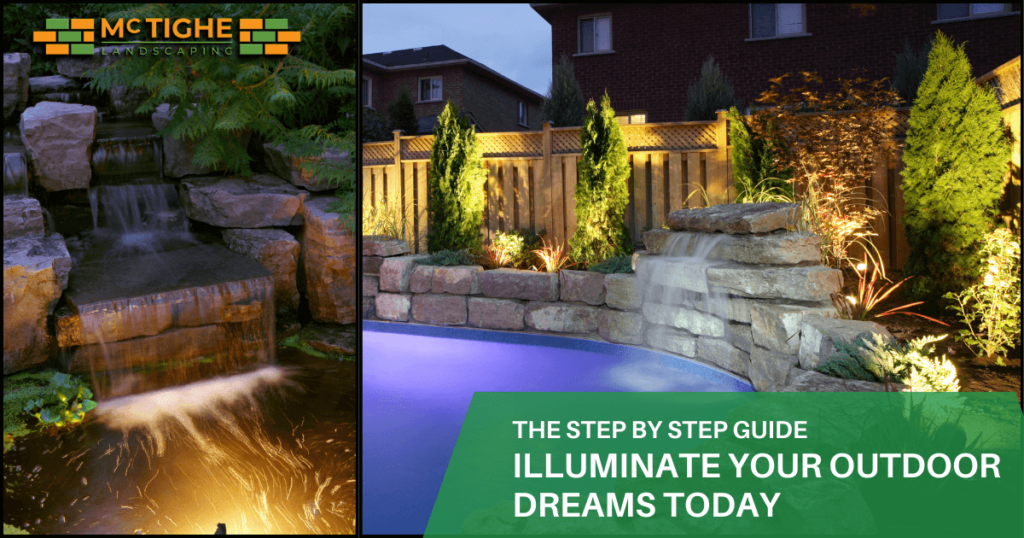
Illuminate Your Outdoor Dreams Today

Conclusion: Illuminate Your Outdoor Dreams Today

Ready to transform your outdoor spaces with stunning landscape lighting? Don’t leave your property in the dark any longer. Our team of experienced professionals at McTighe Landscaping is here to help you design and install the perfect lighting system for your unique needs and preferences.

A well-designed landscape lighting system is more than just an addition to your property – it’s an investment in beauty, safety, and enjoyment that will pay dividends for years to come. By following the steps outlined in this guide, you can create a captivating nighttime landscape that enhances your home’s curb appeal, improves safety, and extends your outdoor living space.

Remember, whether you choose to tackle this project yourself or enlist the help of professionals, the key to success lies in careful planning, thoughtful design, and quality implementation. Take the time to assess your property, define your objectives, and choose the right techniques and fixtures for your unique landscape.

Your Next Steps

  1. Conduct a thorough nighttime assessment of your property.
  2. Sketch out your initial lighting design ideas.
  3. Research energy-efficient fixtures and control options.
  4. Consider your budget and whether professional installation is right for you
  5. Contact McTighe Landscaping for expert advice and a free consultation.

Don’t wait to bring your landscape lighting vision to life. Contact us today and take the first step towards a beautifully illuminated outdoor oasis that you can enjoy long after the sun goes down.

Call McTighe Landscaping at (669) 232-8050 or share your project ideas with us using our online form. Let’s light up your world together!

Transform your nights, enhance your home’s beauty, and create unforgettable outdoor experiences with expert landscape lighting design. Your dream nightscape awaits – let McTighe Landscaping help you make it a reality.

Frequently Asked Questions

The cost of professional landscape lighting installation can vary widely depending on the size of your property, the complexity of the design, and the quality of fixtures used. On average, homeowners can expect to spend between $2,000 and $6,000 for a comprehensive landscape lighting system. However, larger properties or more elaborate designs can cost upwards of $10,000 or more. It's best to get quotes from several reputable landscaping companies to get an accurate estimate for your specific project.

High-quality LED landscape lights can last up to 50,000 hours or more, which translates to about 10-20 years of regular use. This long lifespan makes them an excellent investment for your outdoor lighting needs. However, it's important to note that the actual lifespan can vary depending on factors such as usage patterns, environmental conditions, and the quality of the LED fixtures. Regular maintenance and proper installation can help maximize the longevity of your LED landscape lights.

While it's possible to install some landscape lighting yourself, particularly solar or low-voltage systems, professional installation is recommended for more complex setups or when working with line-voltage systems. This ensures safety, code compliance, and optimal performance. If you're confident in your DIY skills and have experience with electrical work, you might be able to handle a simple low-voltage system. However, for more elaborate designs or if you're unsure about any aspect of the installation, it's best to consult with a professional landscaping company.

Regular maintenance of your landscape lighting system includes cleaning fixtures, trimming plants around lights, checking and tightening connections, and replacing bulbs as needed. It's also a good idea to adjust fixture positioning seasonally to account for plant growth. Here are some specific maintenance tasks:

  1. Clean fixtures regularly to remove dirt, debris, and mineral deposits.
  2. Check for and replace any damaged wires or connectors.
  3. Adjust lighting angles as plants grow or your landscape changes.
  4. Test your system periodically to ensure all lights are functioning properly.
  5. Consider having a professional inspection annually to catch any potential issues early.


Proper maintenance will help ensure your landscape lighting system continues to perform optimally for years to come.

Low-voltage systems operate at 12 volts and are safer, more energy-efficient, and easier to install than line-voltage systems, which operate at 120 volts. Here are the key differences:

  1. Safety: Low-voltage systems pose less risk of electrical shock, making them safer for DIY installation and around water features.
  2. Energy Efficiency: Low-voltage systems typically consume less power, resulting in lower energy bills.
  3. Installation: Low-voltage systems are easier to install and don't require deep burial of wires, making them more flexible for landscape designs.
  4. Fixtures: Low-voltage fixtures are often smaller and more versatile, allowing for more creative lighting designs.
  5. Cost: While initial costs may be similar, low-voltage systems are usually less expensive to operate and maintain over time.


Line-voltage systems are typically used for larger properties or when more powerful lighting is required, such as for large flood lights or security lighting. However, for most residential landscape lighting needs, low-voltage systems are the preferred choice due to their safety, efficiency, and flexibility.

Facebook
Pinterest

Enhance Your Outdoors – Contact Us Today for Top-Quality Landscaping and Hardscaping Services!